
Controlling an AXA Remote Window controller from your Home Assistant system
 This module will connect the AXA Remote 2.0 with your Home Assistant Server using ESPHOME. The module will integrate in Home Assistant, showing the position of your Window (open or closed), and give you the possibility to open and close the window from there. The remote control will still work, the status of the window will synchronize with home assistant.
The module is using a 5V power supply, and I use a DC-DC step-up converter (MT3608) to create the 8V (7.5 with some cable loss) for the AXA Remote from the 5V power supply. So, NO batteries needed in your AXA Remote (Remove these before plugging in the connector)! The Power Supply should have enough capacity to handle the motors inside the AXA. Preferable is a Raspberry Pi supply (model 3, 2.5A or more). The power can be connected via the WEMOS USB plug, or directly to the 5V and GND pin of the WEMOS. The DC-DC Converter should be adjusted to 8V, using a multimeter. You can plug in the power adapter to this module as well for delivering power.
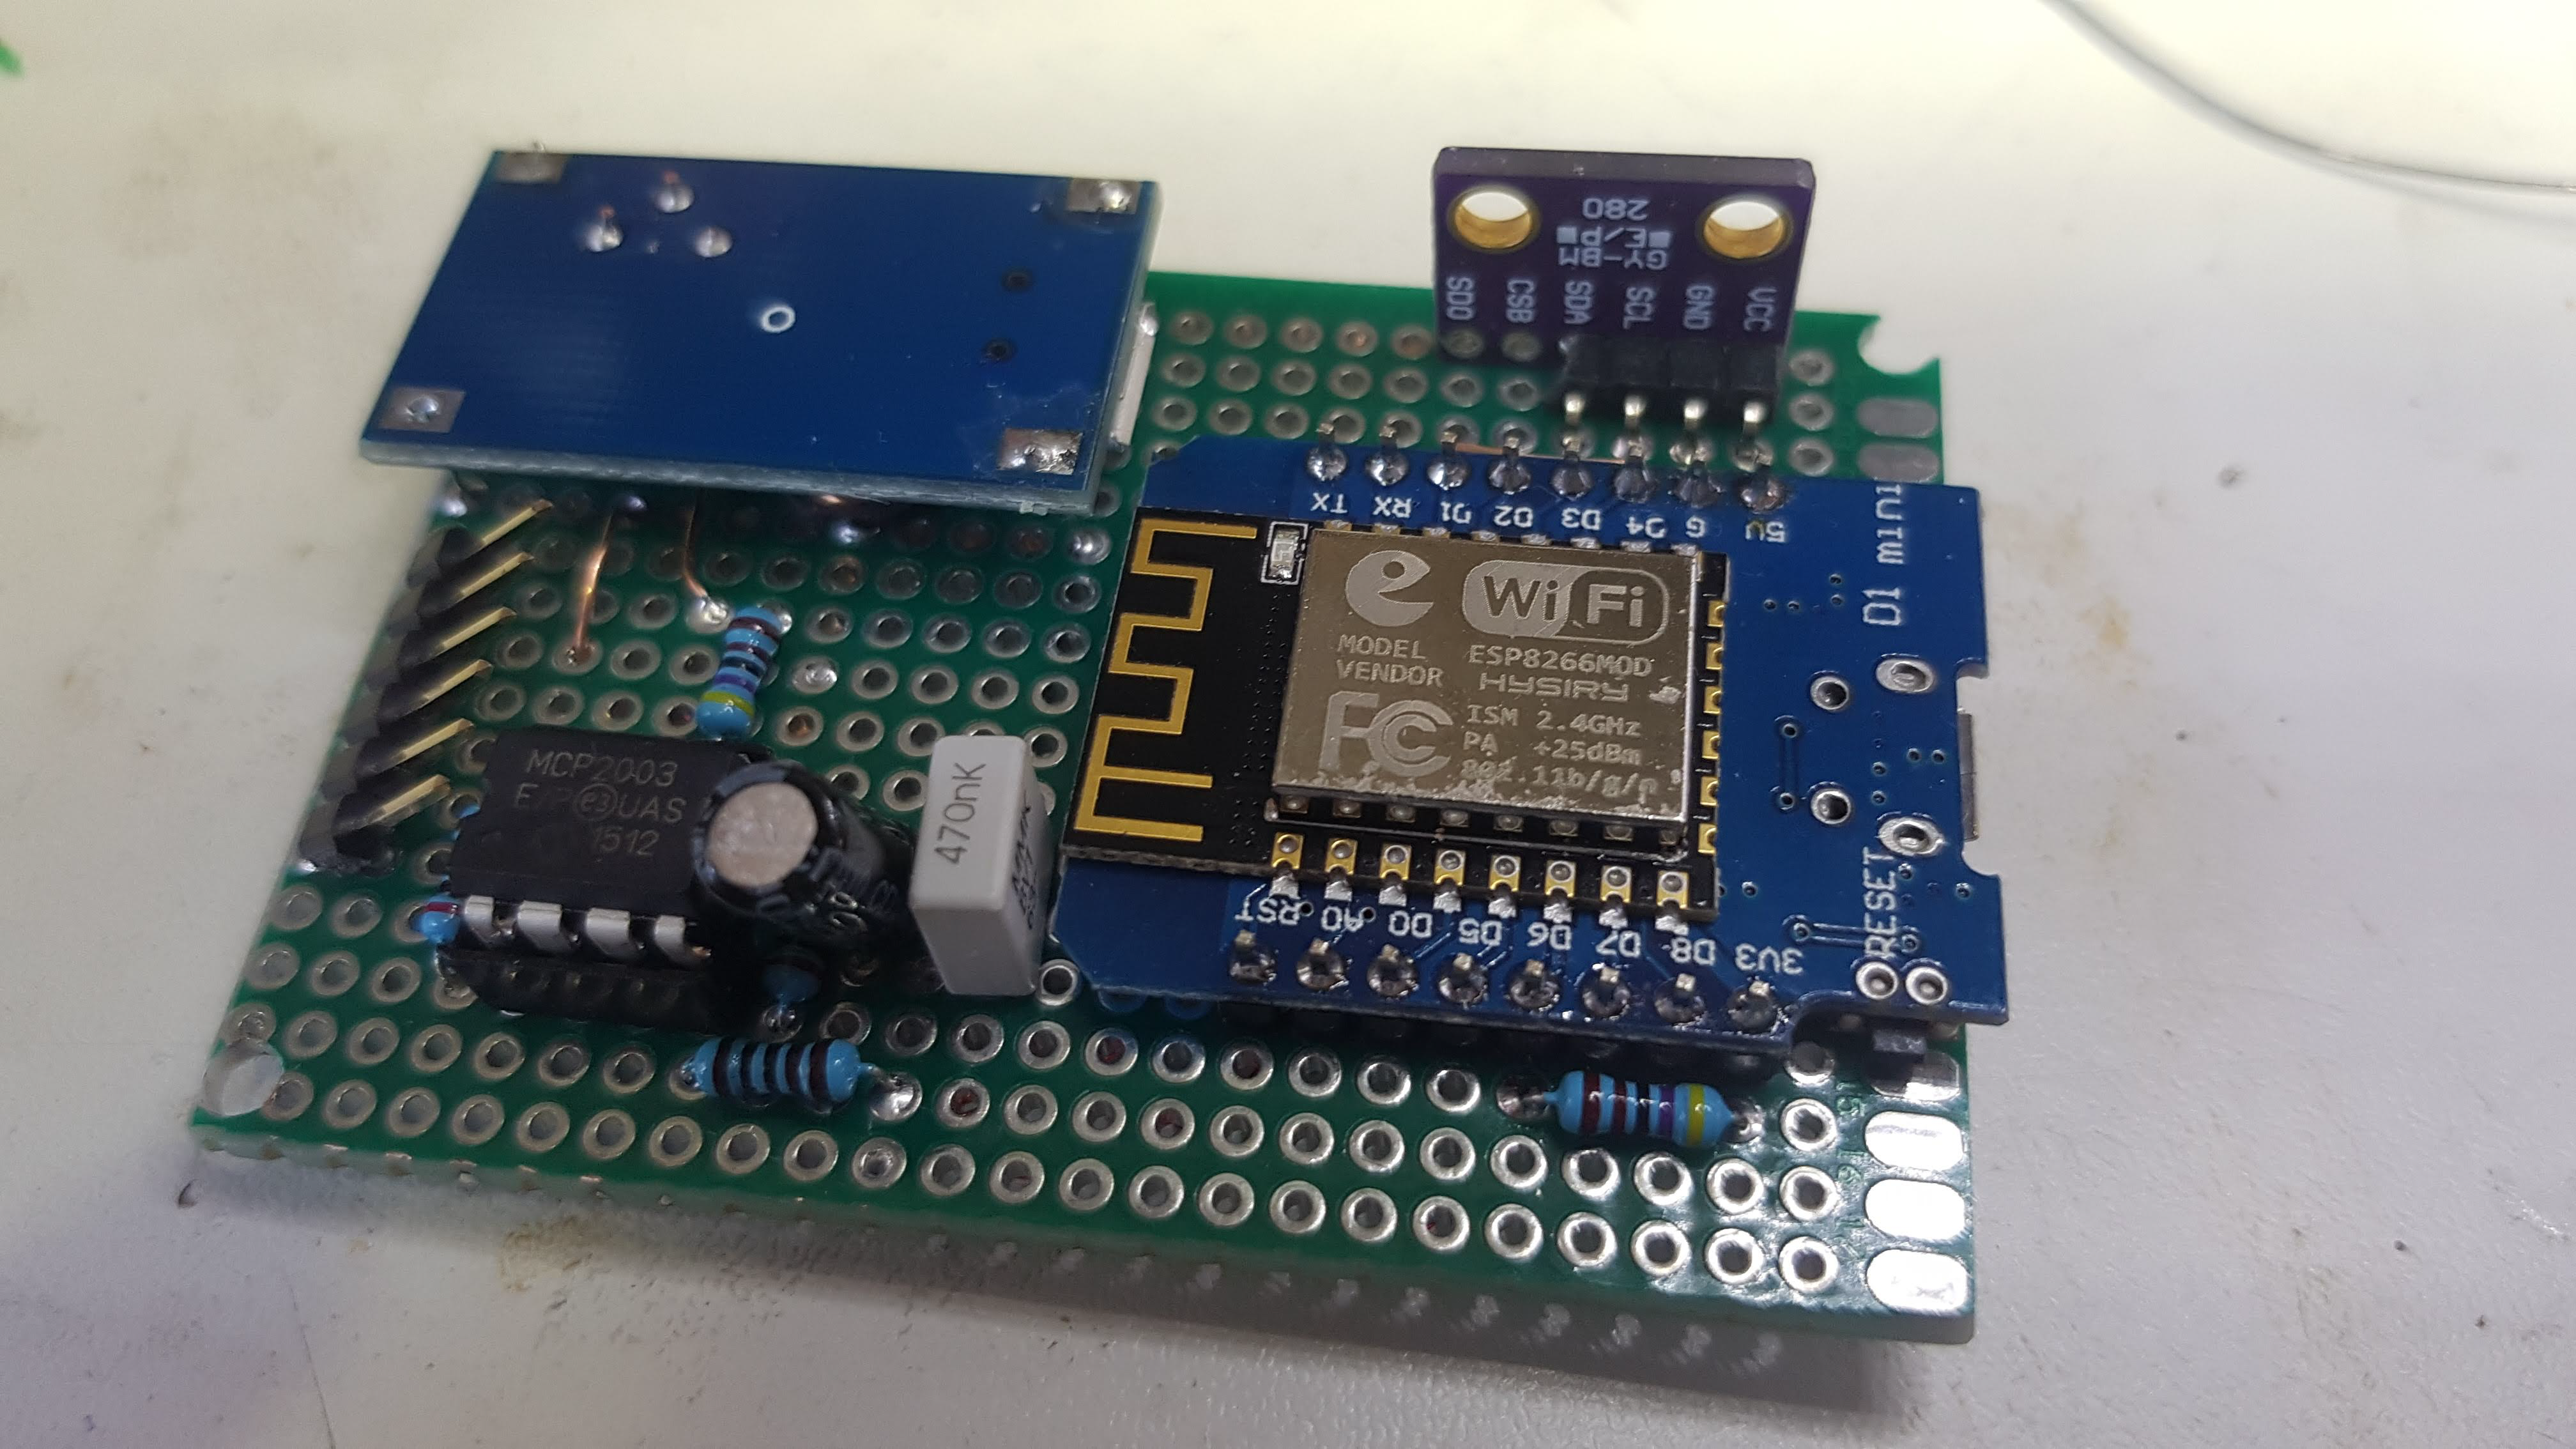
This is more like 'connecting the modules'. The DC-DC converter is connected to 5V and the power input of the AXA Remote (pins 1 and 2). The MCP2003 is the LINBUS driver. It has some special 'low power' capabilities we will not use. Therefor the /WAKE function is disabled, and Vren is not used. RxD is the OUTPUT signal! It should be connected to Rx of the Wemos. This is an 'open drain' output, so we have to pull-up to 3.3V to create a Wemos compatible signal. The input is Tx, this is a TTL compatible input, but will accept the 3.3V as a '1'. The decoupling capacitors used are 47uF, but any value > 10uF is OK. As an extra a BMP/BME280 module is integrated to measure Temperature, Pressure and Humidity (BME). A nice feature of ESPHOME, just to show, but not necessary for the AXA control.

Sometimes difficult to find, my sources (NO affiliate links 🙂 ):
No PCB (yet), so you must use a protoboard to connect the components. Before connecting the AXA and the MCP (if you use a socket), measure the correct voltage on the MCP2003 pins (8V) and the AXA connector. Be aware that mounting the temperature sensor as shown, will give a +5 degrees temperature due to the 'hot' Wemos module. Attach the sensor with wires, if possible.
We use ESPHOME to create the firmware. This is more like a configuration than a program. espaxa.yaml has all the definitions and is also referring to some program code in AXA/espaxa.h. You must create this directory and put the expaxa.h file in it. Also fill in the WiFi credentials (or better: use the secrets file). More info on esphome here or here. To start, connect the ESPAXA (without connecting the AXA Remote) directly to your USB port to upload the sketch the first time. Now OTA is installed, you can upload any new sketch 'Over the Air'. ESPHOME will try to find the module itself. If not, you must manage your DHCP server and 'hardcode' an IP address. The 'Closing' sequence starts with a short 'Open' command. It seems the AXA Remote will 'block' at the end position. By sending an 'Open' command before closing, the unit will 'deblock'.
Use a RJ12 connecter to connect the module to the AXA remote. Use the connection in the schema. Remove the batteries in the AXA Remote!

By looking at the logs (you can use the webserver at the modules address, the serial port output or the esphome logs command), you can see if the module is working. It will output the WiFi connection, Home Assistant connection and at a 30 sec interval the state of your Window. If any command is given, this will show up as well.
[20:44:04][D][sensor:092]: 'Axa Window': Sending state 0.00000 with 0 decimals of accuracy
[20:44:34][D][espaxa:054]: 211, 211 Strong Locked
[20:44:34][D][sensor:092]: 'Axa Window': Sending state 0.00000 with 0 decimals of accuracy
[20:44:59][D][cover:072]: 'Zolderraam' - Setting
[20:44:59][D][cover:082]: Command: OPEN
[20:44:59][D][cover:152]: 'Zolderraam' - Publishing:
[20:44:59][D][cover:160]: State: CLOSED
[20:44:59][D][cover:168]: Current Operation: IDLE
[20:45:04][D][espaxa:054]: 210, 210 UnLocked
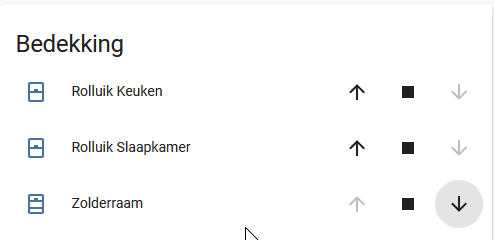
The ESP module will show up as a new integration. After enabling this integration, you can add the entities given in your espaxa yaml file in your interface. The objects will already use their default MDI picture.
For inspiration and examples:
Use this project as-is, I am not responsible for any unexpected open window at your home, or any damage to any hardware. This is a creative commons project, for non-commercial use only.
- PCB?
- multiple AXA Remotes chained? Two should work on one power supply, more will need some adjustment in the power management.